Forming Facilities
Incremental Rolling Machine
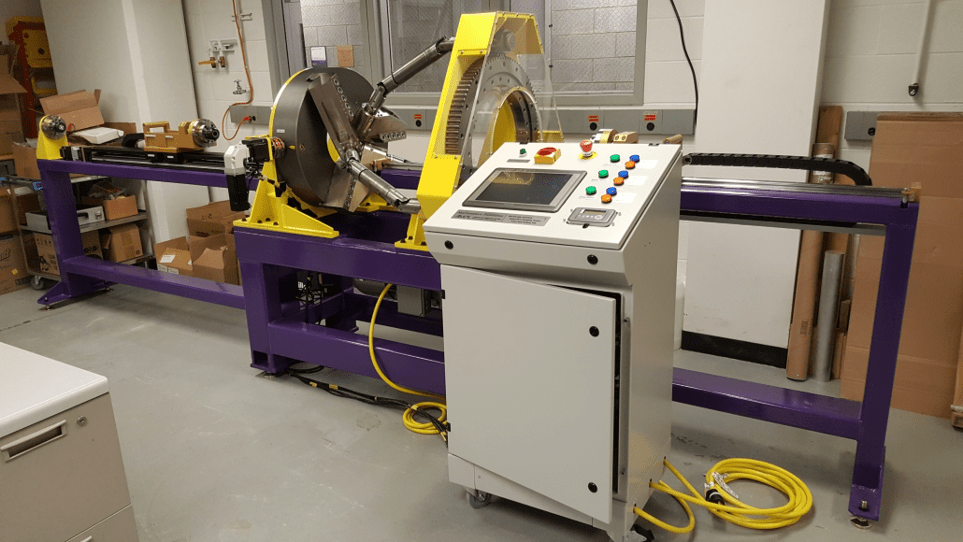
A three-roll incremental rolling machine is designed to producing rods with various outer diameters.
Overall size (L/W/H): 4680/1060/1627 mm
Control/HMI: PLC/12″ touch panel
Travel of input motion: 1359 mm
Travel of output motion: 1740 mm
Maximum speed of each roll: 29 rpm
Maximum torque of each roll: 620 Nm
Maximum radial rolling force: 66 kN
Outer diameter of workpiece (before/after): 25.4/6 mm
Macro-scale DSIF Machine
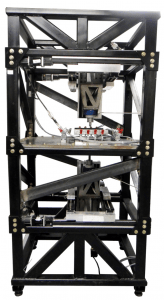 Macro-scale DSIF machine has been designed and assembled in the AMPL at NU. Two opposite x-y-z linear stages are built to hold two forming tools. A 6-DOF load cell is mounted on each tool holder
Capable of various ISF processes: Double-sided incremental forming (DSIF), Single-point incremental forming (SPIF), Two-point incremental forming with a die (TPIF)
Degrees-of-freedom: two X, Y, Z units with Delta Tau high precision controller
Speed capacity: < 10 mm/s
Forming space: 200 x 200 x 300 mm^3
Max load capacity of the machine: Z axis: 2000 N, X, Y axes: 1500 N
Sheet thickness: 0.5 mm – 2.0 mm
Repeatability: ±0.02 mm
Position accuracy: ±0.01 mm / 100 mm
Double Sided Incremental Forming (DSIF) Machine at Meso-scale
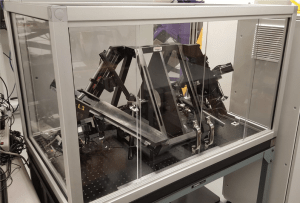
A novel DSIF desktop machine has been built for DSIF at meso scale. The new desktop machine with meso-scale motions was developed based on our design of the Tri-pyramid Robot.
Metal Additive Manufacturing
Additive Rapid Prototyping Instrument (ARPI)
The Additive Rapid Prototyping Instrument (ARPI) is an open-architecture custom built laser, powder-blown Directed Energy Deposition (DED) system developed and built at AMPL. This instrument has been used to investigate fundamental mechanisms, validate computational models and analytical models, as well as demonstrate proof-of-concept techniques for DED such as laser polishing of AM parts and functionally graded materials. The system includes: 1 kW CW Gaussian laser (λ = 1070 nm, IPG Photonics), primary laser optics process head (Precitec), secondary galvo scanner laser processing system (Surelite, Aerotech), multi-material powder delivery system (GTV), nozzle adapter (in-house), COAX 14 nozzle (Fraunhofer), environmental chamber (in-house), and 9-axis motion control stage (Aerotech). The processing head for the laser optics is modular and includes optics on a manual stage to change the beam diameter between 0.5 mm – 3.5 mm. There is an additional module for visualization of the melt pool (or work piece) using a CCD or CMOS camera. A Nuburu AO-500 blue wavelength laser can also be utilized with this system to process materials with minimal absorption in the IR laser range. Finally, a thermal plate can be used within the ARPI chamber, where the base plate temperature can be held anywhere from -100 ºC to 500 ºC, enabling research on controlling the thermal history of a part. The ARPI is an important research instrument for DED because all the process parameters can be controlled by the user, whereas many commercial machines use ‘pre-set’ values for different materials or geometries. This enables exploration of large parameter sets as well as modular instrumentation that includes in-situ monitoring and closed-loop control.
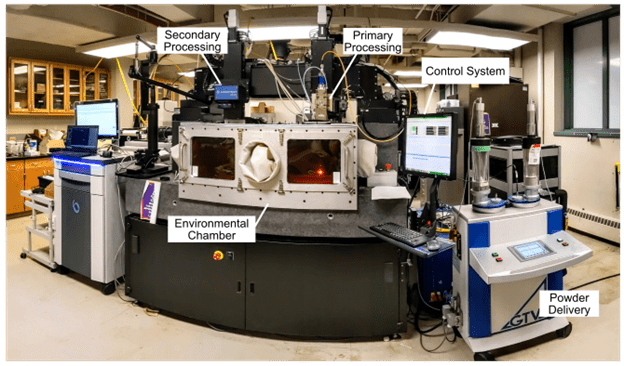
Fig. 1. Additive Rapid Prototyping Instrument (ARPI)
Thermal Camera In-situ Monitoring Capabilities
Due to localized heating during the DED process, different sections within the specified part geometry will experience different thermal histories. While a single clad being deposited on a substrate can reach steady state, heat accumulation, fluctuations in the melt pool, and local geometry create a non-steady state process throughout a multi-layer DED part. Since the ARPI is a modular instrument, many monitoring techniques can be used with the system. Currently, however, there are two ways that a thermal image can be taken during an experiment on the ARPI: off-axis and coaxially. Off-axis temperature measurements include thermocouples or an IR camera. Thermocouples can be attached to the substrate during deposition to monitor boundary conditions for use in finite element models (FEM), however, the data is only 1D. An IR camera can be used to measure the 2D global thermal field of a DED part. The ARPI has a FLIR A655sc camera, Fig. 2 that can be situated in the environmental chamber to observe an experiment.

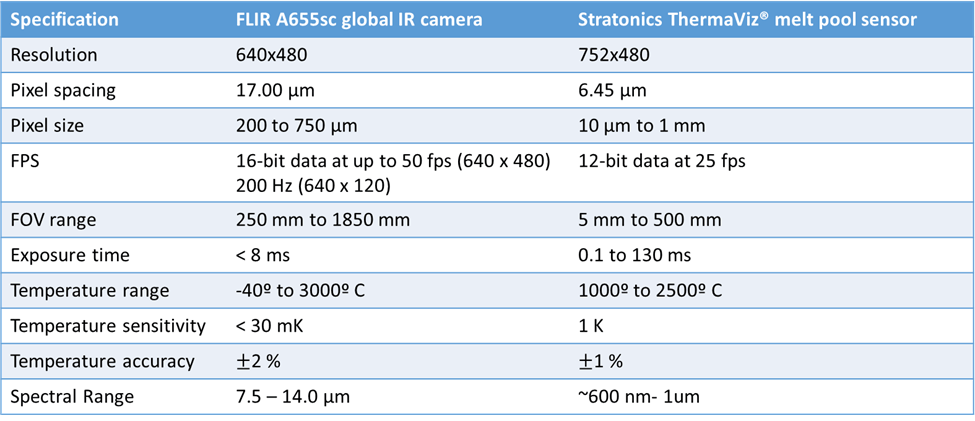
Fig. 2. Thermal monitoring capabilities of the ARPI with both global and local relative temperature measurements.
While IR cameras are very useful for temperature measurements, they are sensitive to emissivity changes in the material. In metals, emissivity is a function of temperature, thus temperature becomes a challenge to monitor using an IR camera during deposition in laser metal AM. It can still be used to measure relative temperature measurements, however, such as cooling rate. Another technique to measure temperature is two color pyrometry, such as in the Stratonics ThermaViz melt pool sensor, Fig. 2. This sensor can be used with the beam splitter module on the primary processing head of the ARPI, where emitted light from the melt pool is captured at two different wavelength bandwidths. The compiled image correlates the ratio of the spectral radiance to temperature (Keller 2010). On the ARPI, this measurement is done coaxially by integrating the camera on the main processing head.
DMG MORI LASERTEC 12 SLM (LT 12 SLM)
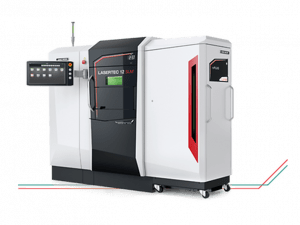 The LT 12 SLM is a commercial powder bed fusion (PBF) machine capable of producing components or specimens in various metallic alloy systems. The machine has an open architecture enabling both materials and controls research. The machine is specially equipped with a dichroic beam splitter to enable real time monitoring of the melt pool. The machine is equipped with a 400 – Watt laser source focused to a minimum working beam diameter of 35 um. The build volume for the machine is 125 x 125 x 200 mm.
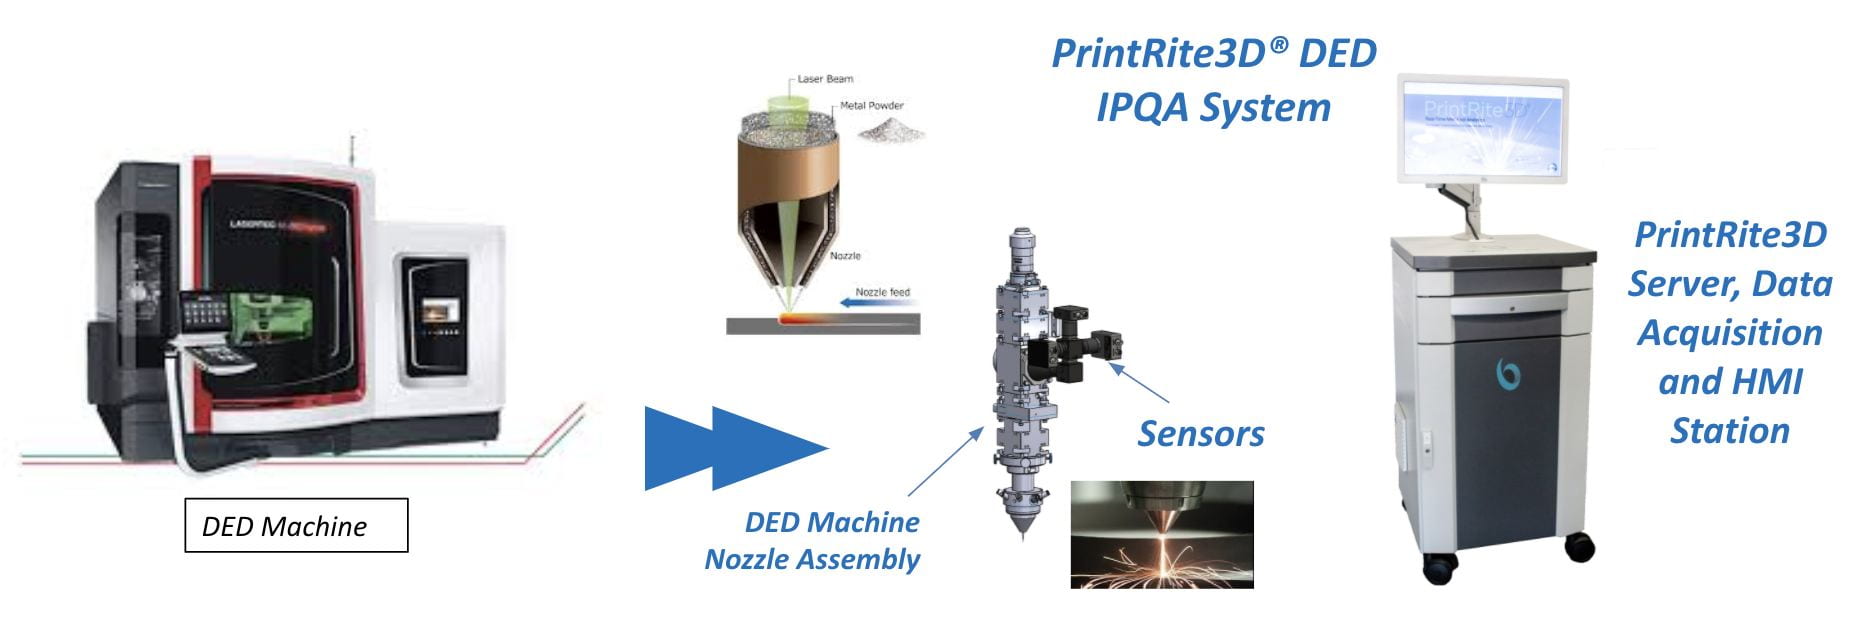 The PrinteRite3D is a system used to monitor the processing parameters and resulting material quality in metal AM. It uses in-situ highspeed spectroscopy to coaxially measure a relative temperature of the melt pool through Planck thermometry. It can collect data up to a rate of 200 kHz and visualizes various metrics (TEP high, TEP Low, TED) on the 3D part geometry.
Microforming Facilities
Desktop Microrolling Mill
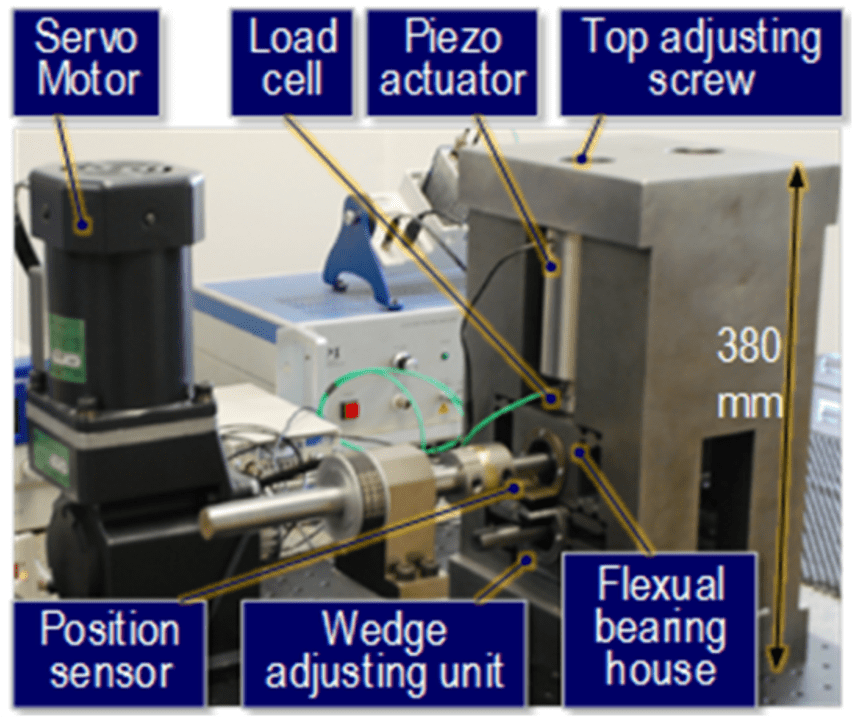
A desktop microrolling mill (DµRM) was designed and prototyped for microrolling of sheet metals.
It is equipped with induction motors, piezo-actuators, capacitive position sensors and load cells.
The entire machine frame and the flexural hinges were cut from a single high-strength steel block by wire EDM, for compactness, structural stiffness and ease of precision control. The flexural hinges enable the movements of flexural bearing houses (FBHs) for roll gap adjustment.
The roll gap adjustment is done with a pair of piezo-actuators on the top of upper FBHs and a wedge unit under the lower FBHs. The piezo-actuator has the stiffness of 360 N/µm, resolution of 0.8 µm and resonant frequency of 4.5 kHz. It is capable of providing a maximum blocking force of 30 kN and pulling force of 3.5 kN. It has a maximum travelling distance of 80 µm.
The capacitive position sensors, which are attached on the sides of the lower FBHs, have a measurement range of ±2 mm with a resolution of 10 nm.
Load cells with 5 kN/μm rigidities and 30 kN load capacities are placed between the piezo-actuators and the upper FBHs for force measurements. The motion of the upper and lower rolls are controlled separately by two individual induction motors with speed control systems. The motor has a maximum torque of 530 lb-in and a maximum rolling speed of 15 rpm at 60 Hz AC power input. Rotary sensors with 0.1° resolution can be installed onto the shaft ends for angular displacement measurements as well.
Psylotech Tensile/Compression Machine
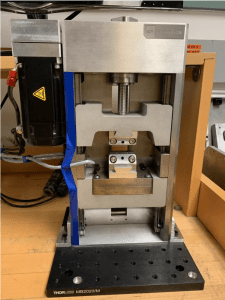
- 1.6 kN force capacity
- High resolution load cell (0.5 mN)
- High resolution cross-head displacement sensor (25 nm)
- System is controlled with a LabVIEW Program
High-frequency Fatigue Test Machine
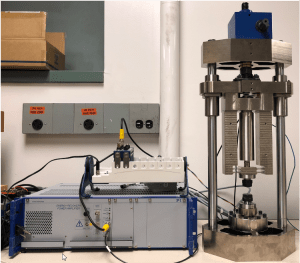
Capable of high-frequency fatigue test for small scale metal cylindrical/sheet specimen
Controlled by LabVIEW
Testing force monitored by a load cell and displayed
Limiting conditions:
Regular working condition: 0N~1500N tensile test at 0Hz~100Hz (without cooling), 100Hz~400Hz (with cooling)
Maximum static tensile force: 2000N
Compressed air cooling
SEMtester 18240LM Miniature Tensile Stage
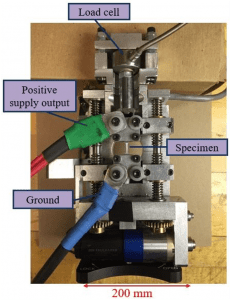
- 1100 N load capacity
- Interchangeable load cells
- Adjustable strain rates
- The device is designed to allow tension and compression test
- The stage has been custom designed to perform electrically-assisted (EA) test
Mechanical Testing System
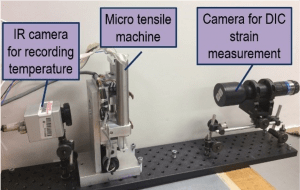
- Non-contact digital image correlation (DIC) method is used for strain measurement
- An infrared camera is used to record the temperature of specimens during EA test.
Laser Micromachining System
Continuum Surelite Ex
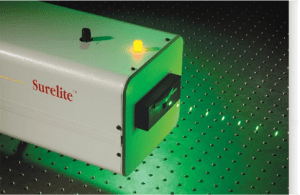
Flash-lamp pumped Nd-YAG laser operating at its fundamental wavelength of 1064 nm
Harmonics has a pulse duration of 6-8 ns and a maximum pulse energy of 0.7 J
Beam has a flat-top profile and can be operated at a maximum pulse repetition rate of 10 Hz
Due to the high pulse intensity, the laser beam after being focused can ionize any medium into an optically opaque plasma
Can send pressure waves into a material
RAPID Lumera Laser
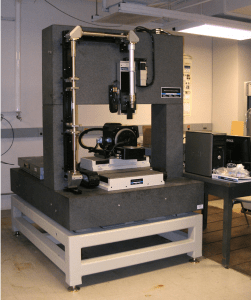
- Capable of micro-machining virtually any material
- High precision control and flexibility
- Diode pumped Nd:YVO4 picosecond laser
- 2W average power at 1064 nm
- Second harmonics at 532 nm
- High pulse energy – up to 30 µJ
- High peak power of up to 20 MW
- Beam quality: M²<1.2
- Repetition rate: 10 KHz to 500 KHz
5 DOF Positioning System
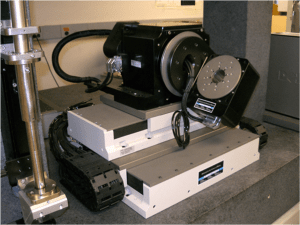 Linear axes resolution of 10nm Rotary axes resolution of 0.0001 degrees
Metrology Instruments
Alicona Infinite Focus-Optical 3D Measurement & Inspection
![]()
- Non-contact, optical 3 dimensional, based on Focus-Variation
- Surface profile form and roughness measurement
- Surface topography Ra above 10-15 nm with a Lc of 2um, surface structure dependent
- Minimum vertical repeatability less than 0.12 um
- Best vertical resolution in the range of 10 to 410 nm
- Fully automated and programmable xyz stages
- Less than 400 um/sec scan speed
- 5x, 20x, 50x and 100x objective
ZYGO NewViewTM 7300 Non-destructive 3D Surface Metrology Tool
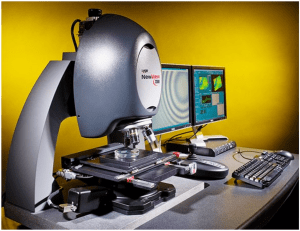
- Surface height measurement from less than 1nm to 20 mm
- Sub-nanometer resolution
- Less than 0.01 nm RMS repeatability
- Fully automated and programmable xyz stages
- Less than 135 um/sec scan speed
- 10x and 50x objectives
High Speed Camera
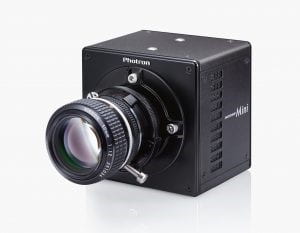
Model: Photron FASTCAM Mini UX 100
Download Datasheet
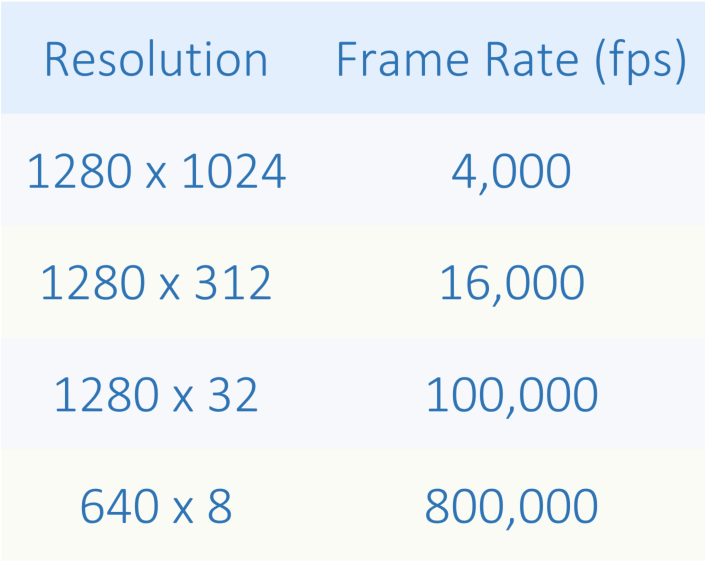
Resolution: 1280 x 1024
Sensor Format: 12.80 (H) x 10.24mm (V) / 16.39mm (D)
Pixel Size: 10 µm
Max Frame Rate:
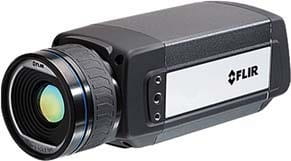
Infrared Camera FLIR A655sc
Model: FLIR A655sc
Download Datasheet
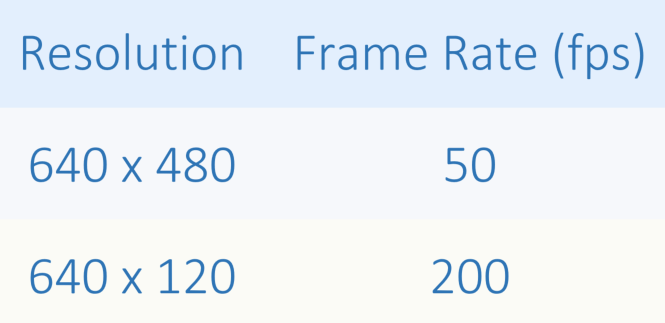
Resolution: 640 x 480
Pixel Size: 17 µm
FOV Range: 250 – 1850 mm
Temperature Range: -40º to 3000º C
Temperature accuracy: ±2ºC
Max Frame Rate:
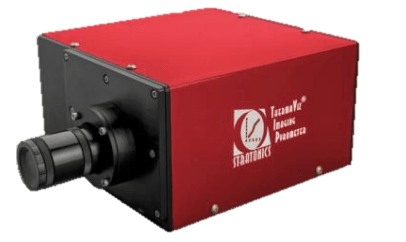
Infrared Camera Stratonics TermaViz melt pool sensor
Model: Stratonics ThermaViz® melt pool sensor
Download Datasheet
IR sensor for melt pool history with two wave calibration
Resolution: 752 x 480
Frame Rate: 25 fps
Pixel Size: 6.45 µm
FOV Range: 5 – 500 mm
Temperature Range: 1000º to 2500ºC
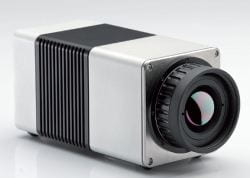
Infrared Camera Jenoptik High Resolution
Jenoptik High Resolution
Thermal camera that can measure temperature in a range of -40°C~1200°C
Temperature resolution of 50mK
Measurement accuracy of ±1.5K
Spectral range is 7.5 μm
Can be operated under -15°C~50°C
Sigma Labs System
Emissions from the melt pool that is formed in DED includes radiated heat from the molten metal pool and vapor plume if vaporization occurs. The material structure will be dependent on the temperature of the melt pool as well as its size. Since the melt pool can change throughout the course of a build due to local geometry and heat accumulation, variation throughout a 3D part will occur and cause nonuniform material structure/mechanical properties. In order to move towards more uniform as-built parts in DED, melt pool monitoring (both coaxial and off-axis) has become a common practice, where the size and temperature of the melt pool has been measured using multiple techniques (Gibson et al. 2020a; Smoqi et al. 2022; Q. Wang et al. 2017). However, most monitoring techniques exclusively look at the melt pool signature and involve highly expensive equipment (e.g., IR cameras). Here, a design is presented that enables in-situ monitoring of calibrated melt pool temperature, emissions from the melt pool in the visible range, and the relative absorption of laser energy. This is accomplished by coaxially mounting an array of photodetectors that are selected for different monitoring tasks, Fig. 3. By splitting the reflected light and emissions from the melt pool, different signatures are captured, and different phenomena can be monitored.
The photodetectors are separated into two categories: Thermal Emission Planck thermometry (TEP) and Thermal Energy Density (TED). The TEP sensors function as a two-color pyrometer while the TED sensors function as intensity sensors. Each category has two individual sensors: TEP-High/TEP-Low and TED-L/TED-M, Fig. 3. The TEP-High sensor is an avalanche photodiode (Thorlabs APD410A) that acquires intensity of the 700 nm wavelength emission from the melt pool using a notch filter, and the TEP-Low sensor (Thorlabs APD410A) acquires intensity of the 680 nm wavelength emission from the melt pool using a notch filter. The High and Low TEP sensors are based on the selection of filters at two different wavelengths (680 nm and 700 nm) so that the ratio of intensities can be used for calibrated temperature acquisition. The TED-L sensor (Thorlabs PDA36A2) acquires signal for wavelengths between 850 nm – 1100 nm using a long pass filter (Thorlabs FEL0850), and the TED-M sensor (Thorlabs APD 440A) acquires signal for wavelengths between 500nm – 800 nm using a short pass filter (Thorlabs FESH0800). In this way, TED-L can be used to monitor the relative amount of reflected laser light (1070 nm) and TED-M can be used to monitor the emitted radiation from the melt pool in the visible range (or energy absorbed by the material). The emitted radiation from the melt pool is separated using two beam splitters to filter light into each of the sensors. The gains on each sensor are adjusted manually for a given material and a ‘nominal’ set of processing parameters. Ultimately, this sensor array provides a 3D map of the part history with respect to calibrated temperature, laser absorption and reflection, as well as material emittance.

Fig. 3. Configuration of photodetector array for coaxial optical emission spectroscopy.
Ultra-Fast Shutter Camera
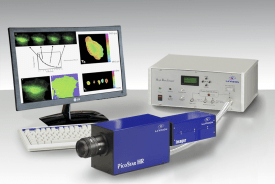
Model: PicoStar 12 System with advanced picosecond-delay unit
Download Datasheet
Delay-Unit Minimum Delay: 1 ps
Intensifier Gating Time: <300 ps
Max Frequency: 110MHz
Extinction Ratio: 1:2000
Sensitivity: Single photon
UV Spectral Sensitivity: 200 nm.
Pixel Size: 6.45 µm
Sensor Format: 2/3”
Computational Facilities
Darth Maul GPU Remote Server
Four Nvidia RTX 8000 GPUs (each with 4608 CUDA cores and 48 GB of memory), 256 GB RAM and an AMD 3970x 32-cores CPU.
Installed software includes: TensorFlow, PyTorch, Caffe, Keras, CUDA, cuDNN
Darth Vader GPU Remote Server
Four Nvidia RTX 8000 GPUs (each with 4608 CUDA cores and 48 GB of memory), 256 GB RAM and an Intel Xeon W-2195 CPU with 18 processing cores
Installed software includes: TensorFlow, PyTorch, Caffe, Keras, CUDA, cuDNN
Anakin Remote Server
4 nodes with 32 Intel Xeon cores and 96 GB of memory per node
Installed software includes: ABAQUS, LS-DYNA, MATLAB, ifort, openMPI, common compilers
Yoda Remote Server
Dual Intel Xeon 24C CPU and 128 GB of RAM
Installed software includes: ABAQUS, LS_DYNA, MATLAB, COMSOL, LS-OPT, CMAKE and various compilers
Chewbacca In-Office Workstation
Intel Xeon 8C CPU, 64 GB of RAM, and NVIDIA Quadro P5000 GPU
Installed software includes: ABAQUS, MATLAB, Anaconda, Adobe, Visual Studio, AMPL toolpath
AMPL PA In-Office Workstation
40 CPU cores, 256 GB of RAM, and NVIDIA Quadro K6000 GPU
Installed software includes: ABAQUS, SOLIDWORKS, COMSOL Multiphysics, Anaconda, Visual Studio, MATLAB
Ares Remote Server
32 nodes with 24 cores per node and 64 GB of memory per node
Installed software includes: Abaqu, Bolt, ImageJ/Fiji, LAMMPS, LS-DYNA, Matlab, and common debuggers and compilers


